I decided therefore to declare an "all in" on the boatbuilding project and with the planks for my pathfinder already been CNC cut since day 2 of the project and looming at me from the shelves beside the boat, "Planking week" was given a clear for take off signal.
The planks are already cut to measure and take into account the required width of the clinker overlap. No spiling off the boat frame required. Given the size of the original ply sheet they are composed of three lengths, two roughly equal ones of around 2.2m and a third much shorter one. The joint is made with puzzle joints so no need for cutting scarfs. Easy!

Planking the whole boat took exactly 6 days, lots of epoxy and great lengths of time staring at the growing hull in the evening after cleaning up. It was nice to see the pile of planking material getting thinner by the day as for the first time in this project I was given the ultimate luxury of time to work on it.

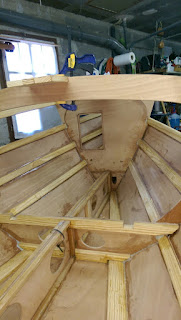
The planks went on very well, matching the shape of the boat traced in 3D by the frames and the stringers exactly as it was on the 3D CAD model the templates were generated from. The only surprise were some long thin gaps appearing between the plank and the stringers towards the fore end of the boat. I initially thought that there was a problem with the bevels I had planed in the stringers and in the adjacent plank. I then realised that what I was seeing was perfectly normal as the relative angle between the planks becomes almost flat towards the bow of the boat and despite the bevel the thickness of the plank below the one being added makes the latter "come off" the stringer. I have filled the gaps with thin battens and thickened epoxy.

Looks beautiful doesnt she? Wow... Good job Lorenzo.
ReplyDelete